

How to Ride an E-Bike on Gravel
The first time pavement turns to gravel, the bike may feel different within a few feet. Small stones move under the tires, steering feels less precise, and stopping can take more room. Choose a short, dry route on compacted gravel, practice a few controlled stops, and learn to spot loose patches before you reach them.
This guide is for riders who are comfortable on pavement and want to try an easy unpaved ride. A level stretch with a clear view and an easy way back gives you time to learn what your bike feels like on a new surface.
Pick Your First Route by Surface
On a route map, “gravel” can mean a smooth layer of crushed stone or a road covered in deep, rolling rocks. Look at recent photos or ask the route manager whether the surface is firm, recently graded, or rutted. Favor a level out-and-back with wide sightlines, few crossings, and a turnaround before any steep or remote stretch. A short ride with two chances to practice the same section can teach you more than a long loop with unfamiliar conditions.
Check e-bike access for every segment before leaving home. In the U.S., the Forest Service explains how routes are designated for e-bike use. In Canada, Parks Canada’s Riding Mountain visitor guidance is one example of a destination that specifies which bikes and routes qualify. Check the relevant land manager’s current rules and closures for your exact bike and configuration. A map labeled “cycling” can leave those details out.
Learn to Read the Surface
Pay attention to changes in color, texture, and depth. A pale strip could be fine, compacted stone or freshly spread aggregate. Look for the texture of the surface and the width of a clear line before committing.
| What you see | What you may feel | What to do |
|---|---|---|
| Firm, even crushed stone with few loose pebbles | Relatively predictable steering | Practice smooth starts, straight-line stops, and broad turns |
| A shallow layer of loose stones on a hard base | A little movement under the front tire | Slow early and steer smoothly through the firmest open line |
| A ridge of stones between compacted tracks | A sudden change in grip when crossing | Stay on a clear, legal track where possible and slow before crossing |
| Repeated washboard ripples | The wheels and saddle bounce in quick succession | Reduce speed on smooth ground before the ripples and choose a smoother section within your lane |
| Deep gravel, sharp ruts, or a soft shoulder | The front wheel can sink or deflect | Stop on firm ground and reassess. Walk only if the footing and bike are manageable |
On wider gravel roads, a compacted strip can look inviting even when it leads across the center or into the path of oncoming users. Stay in your lane or on the designated riding side. If the cleanest line would take you somewhere unsafe, slow down and wait.
Practice on the First Firm Stretch
Before the ride, check cold tire pressure using the guidance for your bike and tires. Inspect the tires for cuts, check the controls and wheel security, and confirm that both brakes respond normally. Carry water and choose a turnaround that leaves time to get back in daylight.
- Start on firm ground. In a flat, open area, try a few straight starts with low, predictable pedal assist. Feel how quickly support comes in before using it near a turn or surface transition.
- Practice a smooth stop. Look ahead, keep the bike upright, and apply both brakes progressively. Repeat from the same low speed so you can feel the difference between the original surface and a suitable stretch of compacted gravel.
- Make a wide turn. Choose a clear corner with room to see the exit. Reduce speed on the straight approach, keep your eyes on the path you want to follow, and steer gradually. Begin pedaling smoothly when the bike straightens.
- Find a safe place to stop and restart. Practice in a firm, flat pull-off. Stopping on the sloping edge of a path can make it hard to plant a foot. Choose your stopping spot before squeezing the brakes.
Keep a relaxed grip, bend your elbows slightly, and scan far enough ahead to make adjustments early. Trek’s gravel riding guide covers the basic skills of looking ahead and managing the bike on loose surfaces.
Handle the Transition From Pavement to Gravel
Suppose you are rolling along a paved path and see a patch of loose stone just after the pavement ends. Ease off pedaling and reduce speed while the bike is still upright on the firmer surface. Look through the patch for a visible exit. If there is a firm, continuous line and you have room to stop, cross with small steering inputs. Resume gentle pedaling when you have settled onto firmer gravel.
Use the same sequence before a gravel corner. Look ahead, slow on the straight, then turn. If a corner tightens or the surface gets looser than expected, stay within the space you can see and reduce speed smoothly as conditions allow. Give walkers and other riders extra room, and follow posted passing and yielding instructions.
Know When to Walk or Turn Back
As you approach a short loose patch, ask whether you can see a firm exit and whether there is room to stop before it. You can reassess from firm ground. If a rut deepens out of sight, the track narrows beside a drop, or you keep making bigger steering corrections, stop before entering.
Dismount only where you can plant your feet securely and safely handle the bike. If walking the bike would also require entering an unstable section, return the way you came when there is a safe place to turn. Plan your turnaround while you still have comfortable daylight, battery, and time margins. For a more remote second outing, use WILDEWAY’s guide to planning an e-bike ride without cell service.
Where the WILDEWAY Wander Ultra Fits
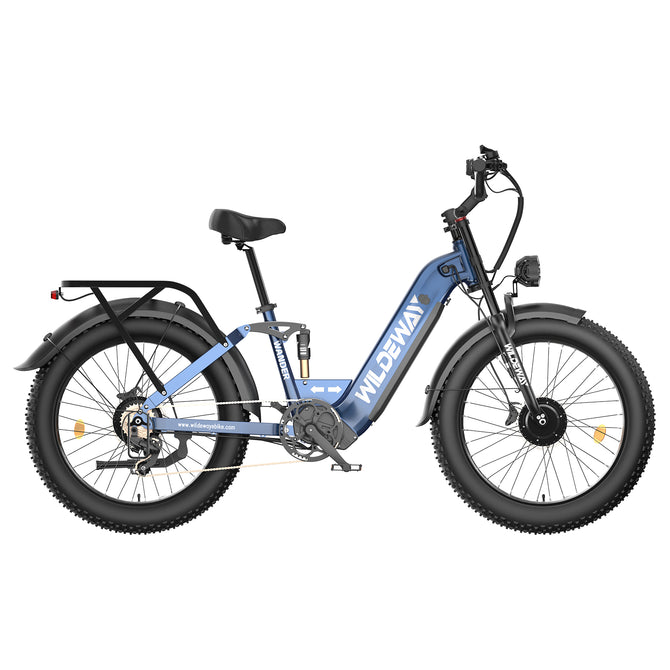
Both North American product listings describe the Wander Ultra as a full-suspension, step-through e-bike with 26 × 4.0-inch tires, front and rear hydraulic disc brakes, and a 48V 30Ah battery. If you are comparing it for mixed-surface riding, look at the features you will use most often. The suspension can help take the edge off repeated bumps, while the tire setup matters on transitions from firm ground to loose stones. The battery rating describes stored energy. For your first outing, set your turnaround using what you observe on the route, including surface, effort, and the energy you will need to get back.
Try the starts, stops, and broad turns described above before committing to a longer ride. See the specifications for your market at the Wander Ultra U.S. product page or the Wander Ultra Canadian product page.
Frequently Asked Questions
What kind of gravel is easiest for a beginner?
Choose dry, packed crushed stone on a mostly flat route. Look for a continuous firm surface, good sightlines, and space to pull off. Ask about recent grading or fresh gravel, which can change how a familiar route rides.
What tire pressure should I use on a fat-tire e-bike for gravel?
Start with the bicycle and tire manufacturers’ guidance for your setup and load. Tire construction, rider and cargo weight, and the surface all affect the choice. If the manufacturer provides an approved range, make small adjustments within it and test on an easy stretch before extending the ride.
Should I use more pedal assist on loose gravel?
Start with the lowest level that allows a smooth, comfortable pedal stroke. Practice how assistance engages on firm ground. Set the level before reaching a loose turn or a steep transition, where a sudden change in power can make it harder to hold your line.
Can I ride an e-bike on a gravel rail trail?
Check the rules for the exact trail segment and your specific bike. Rail trails may cross several jurisdictions or properties with different access rules. If riding permission is unclear, choose a route where the manager confirms your configuration is allowed.
For your first outing, pick one short section you can ride in both directions. Identify where the surface changes, practice slowing before a loose patch, and stop somewhere firm before heading back. You will leave with a better sense of how your bike responds and which surface to choose next time.


