

How to Descend Safely on an E-Bike: Braking, Heat, and Control on Long Hills
Long downhill sections can be more demanding than the climb. Speed builds quickly, grip can change without warning, and repeated braking creates heat.
Safe descending begins before the slope. Inspect the bike, enter at a conservative speed, use both brakes progressively, finish most braking before corners, and avoid continuously dragging the levers. If braking performance changes, stop in a safe place and let the system cool rather than trying to “make it to the bottom.”
Why Long Descents Need a Different Plan
Rider weight, battery configuration, cargo, speed, and gradient affect the energy the brakes must manage. Motor power that helps uphill does not remove braking heat downhill.
Brake fade is a temporary reduction in braking performance associated with excessive heat. Shimano explains that repeated strong braking on a long, steep descent can build heat and reduce consistent braking performance. SHIMANO BIKE COMPONENT Its hydraulic-brake safety guidance also warns that continuous brake application can cause a sudden increase in lever stroke. Manuals & Technical Documents
A product-page brake description cannot prove a descent is safe. Grade, length, surface, weather, load, technique, maintenance, and component condition all matter.
Complete a Downhill Safety Check
Do these checks before reaching the top of a long descent—not after the bike has begun accelerating.
Brakes
- Test the front and rear brake separately while stationary.
- Confirm that both levers feel consistent and do not pull unusually close to the handlebar.
- Look for fluid leakage, damaged hoses, loose components, or a cracked or visibly deformed rotor.
- Check pad and rotor wear against the limits for the exact installed brake system.
- Make sure no oil, polish, or chain lubricant has reached the pads or rotors.
New pads and rotors require the manufacturer’s bed-in process. SRAM describes bed-in as creating an even transfer layer for consistent braking. SRAM Do not begin a demanding descent with untested new parts.
Tires and Wheels
Check tire pressure when cool and stay within the permitted range. Inspect tread, sidewalls, wheel security, and spokes. Wide tires cannot create grip on loose gravel, wet leaves, ice, mud, or painted markings.
Steering, Frame, and Load
Confirm that the handlebar, stem, headset, fork, saddle, battery, and wheels are secure. Remove loose accessories. Keep cargo within published limits, centered, and firmly restrained. A shifting load can change balance during braking or cornering.
Route and Conditions
Know the length, steep sections, turns, intersections, loose surfaces, and safe pull-offs. Check current conditions. Choose another route when the descent exceeds your experience or the bike’s condition.
Seven Techniques for Safer E-Bike Descending
1. Enter Slower Than You Think You Need To
Reduce assistance and settle into a controlled speed before the grade steepens. Keep fingers ready on both levers without holding them partially engaged for the entire hill.
2. Use Both Brakes Progressively
Apply front and rear braking smoothly so the tires continue rolling rather than locking. The front brake can provide substantial stopping force, but an abrupt grab can overload available traction or pitch weight forward. Practice on a flat, open surface before attempting steep terrain.
Braking balance changes with slope, surface, load, and rider position; no universal front-to-rear percentage fits every descent.
3. Brake Before the Corner
British Cycling advises completing most braking before changing direction. Enter the turn at a speed that lets the tires focus on cornering rather than simultaneously handling maximum braking force. britishcycling.org.uk
Look through the turn and keep movements smooth. Assume an unfamiliar corner may tighten or contain gravel, water, debris, or a stopped vehicle.
4. Avoid Continuous Brake Dragging
Continuous light pressure can keep pads and rotors generating heat without enough cooling time. Where the surface and grade allow, use clear, controlled braking phases to reduce speed, then ease pressure while remaining within a safe speed range.
This is not permission to let the bike run away between applications. If releasing the brakes causes speed to return too quickly, stop at a safe pull-off and let the system cool. Do not continue onto a descent that cannot be controlled without constant excessive braking.
5. Keep a Stable Body Position
Stay relaxed, bend elbows and knees slightly, and keep secure pedal contact. Shift slightly rearward as the slope steepens without unloading the front tire excessively.
Keep your head up and scan ahead. A rigid grip can make steering corrections abrupt, while looking only at the front tire reduces the time available to react.
6. Manage Motor Assistance Before the Descent
Select a low or zero-assistance setting before the steep section when appropriate. Keep hands away from the throttle and avoid pedaling unintentionally through tight turns.
Brake-lever motor cutoffs do not replace deliberate speed control. Stop riding if assistance behaves unexpectedly.
7. Leave More Space
Increase the gap to other road or trail users. Speed, load, wet weather, loose surfaces, worn tires, and overheated brakes can increase stopping distance. Announce slowing or stopping in a group.
Recognize Brake-Heat Warning Signs
Stop at the first safe location if you notice:
- Braking force decreasing for the same lever input.
- Lever travel becoming longer or the lever feeling unusually soft.
- A new scraping, grinding, or pulsing sensation.
- A rotor that appears cracked or deformed.
- Brake-fluid leakage.
- Smoke, an unusual odor, or abnormal heat.
- A wheel that no longer turns normally after braking.
Do not touch rotors or calipers; both can cause burns. Do not pour water onto hot components or attempt unapproved roadside hydraulic adjustments. Shimano specifically warns that rotors and calipers become hot during braking and should not be touched immediately after riding. Manuals & Technical Documents
Let the brakes cool naturally in a safe place. If lever feel or braking power does not return completely, if damage is visible, or if the problem repeats, arrange recovery or professional service rather than continuing the ride.
Wet, Loose, and Unpaved Descents
Wet surfaces require earlier and gentler braking. Shimano notes that wet-weather stopping distance is longer and tire traction is reduced. Manuals & Technical Documents Loose gravel and sand can also allow a locked wheel to slide with little warning.
Slow down before reaching the low-grip section. Keep the bike as upright as practical while braking, avoid sudden steering, and release some brake pressure if a wheel begins to skid. Walk the bike when the available traction, visibility, or stopping space is not adequate for riding.
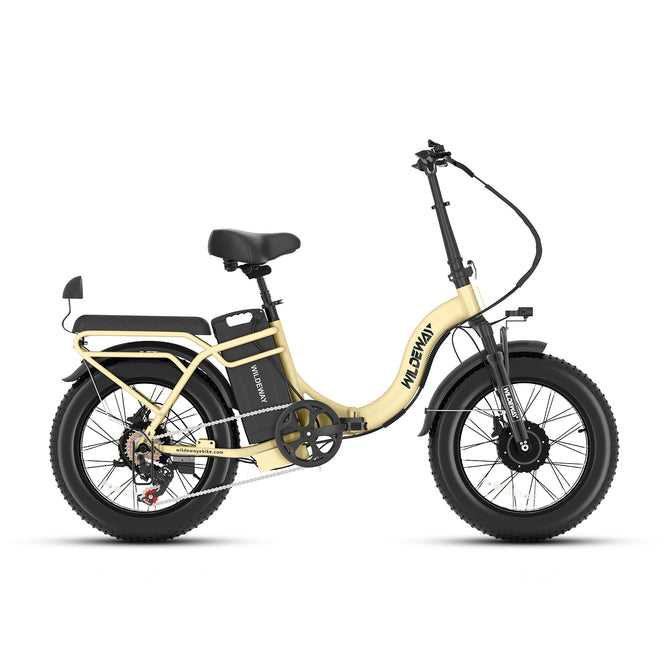
Applying the Guide to WILDEWAY SummitX
The current SummitX page lists the following relevant characteristics:
| Current SummitX feature | Why it matters downhill | What it does not guarantee |
|---|---|---|
| Front and rear hydraulic disc brakes | Progressive control when maintained and used correctly | Immunity from heat, wear, contamination, or poor technique |
| 180mm front and rear rotors | Published braking-system configuration | Safe performance on every grade or at every load |
| 20 × 4.0-inch tires | Broad tire footprint and mixed-surface capability | Grip on ice, mud, wet paint, or loose debris |
| 65mm adjustable suspension fork | Helps manage some front-wheel impacts | Rear suspension—the current page states SummitX has none |
| 121.5 lb with 32Ah battery; 132.7 lb with 60Ah | Shows why early speed control and route planning matter | A universal stopping distance |
| Motor cutoff at the brake levers | Interrupts motor support when braking | A replacement for correct braking technique |
These specifications are consistent across the current SummitX main and combo pages. Wildeway Braking and traction still depend on speed, surface, tires, load, maintenance, temperature, and rider input.
Practice straight-line braking, controlled stops, and low-speed turns on level ground before seeking hills.
When to Book Brake Service
Arrange qualified service when the lever feels soft or changes travel, braking is uneven, the bike pulls to one side, pads or rotors reach their manufacturer’s wear limit, a rotor is damaged, fluid leaks, or overheating symptoms recur.
Do not mix brake fluids, pad shapes, compounds, rotors, or other components based only on visual similarity. Use the exact installed caliper and rotor identification and the component manufacturer’s compatibility information.
Frequently Asked Questions
What Is E-Bike Brake Fade?
Brake fade is a reduction in braking performance associated with excessive heat. The rider may need more lever input or notice less deceleration. Stop safely and allow the system to cool; repeated or persistent symptoms require service.
Should I Use Only the Rear Brake Downhill?
No. Controlled use of both brakes generally provides more balanced deceleration. Relying only on the rear can increase stopping distance and make the rear tire easier to skid.
Is Pumping the Brakes Always Safer Than Continuous Braking?
Not in every situation. Controlled braking phases can reduce continuous heat input, but the bike must remain within a safe speed. If it accelerates too quickly when the brakes are released, stop at a safe location instead.
Can I Touch the Rotor to Check Whether It Is Hot?
No. Rotors and calipers can cause burns. Allow them to cool naturally without touching them or pouring water onto them.
Do Larger Rotors Eliminate Brake Fade?
No. Rotor size is only one part of a braking system. Load, speed, grade, pad compound, system condition, technique, and cooling all affect performance.
Can I Carry a Passenger Down a Long Hill?
Only if the bicycle is designed and equipped for that use and local rules permit it. Additional mass changes braking and handling. Never exceed bicycle or accessory limits, and do not use a demanding descent to test passenger handling.
Conclusion
Safe e-bike descending is a speed-management skill, not a test of maximum braking power. Inspect the bike, slow before the grade, use both brakes progressively, complete most braking before turns, avoid continuous heat buildup, and stop immediately when braking performance changes.
For riders comparing a folding fat-tire e-bike for hills, everyday utility, and longer riding days, the WILDEWAY SummitX offers hydraulic disc brakes, 20 × 4.0-inch tires, front suspension, and two battery choices. Choose the configuration that fits your route and lifting needs, then build downhill skills gradually in a controlled environment.


