

How to Choose a Hitch Rack for a Fat-Tire E-Bike: 12 Checks Before You Drive
A hitch-mounted platform rack can be one of the most practical ways to transport a full-size fat-tire e-bike, but the words “e-bike compatible” are not enough. You must match the bike, rack, receiver, hitch, and vehicle as one system.
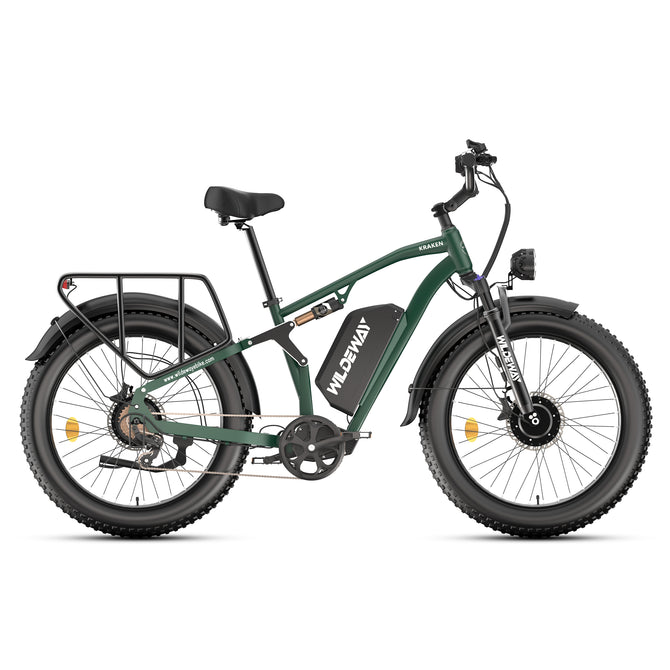
That matters for bikes such as the WILDEWAY KRAKEN. Its current product page lists a 108-pound bike weight, 26 × 4.0-inch tires, a removable battery, and overall dimensions of 79.9 × 28.3 × 48.4 inches. Wildeway Those figures help begin the search, but they do not by themselves confirm rack compatibility. The page does not state whether the published weight includes the battery, and overall length is not the same as wheelbase.
Why “E-Bike Compatible” Does Not Guarantee a Safe Fit
Rack limits are component-specific. A rack may carry two light e-bikes but still reject one bike that exceeds its per-bike limit. It may have enough total weight capacity but trays too narrow for 4-inch tires. A rack approved behind a passenger vehicle may have a lower rating—or no approval—behind a motorhome, travel trailer, or fifth wheel.
Current specifications illustrate the difference. Yakima’s July 15, 2026 guidance lists hitch racks with per-bike ratings from 60 to 80 pounds and requires checks for wheel size, tire size, frame style, and fenders. Yakima Racks A current Küat single-bike rack is rated for 100 pounds in its standard configuration but 67 pounds on an approved RV hitch. Kuat Racks These are examples, not KRAKEN recommendations.
The 12-Point Fat-Tire E-Bike Hitch-Rack Checklist
1. Find the Bike’s Actual Transport Weight
Start with the manufacturer’s published weight, then weigh the bike in the condition you will transport it. Account for the battery, rack-mounted accessories, bags, locks, bottles, and any permanently installed parts.
Removing allowable accessories can reduce the load, but never remove structural or safety components to meet a limit. If the published weight does not say what it includes, do not estimate.
2. Check the Rack’s Per-Bike Limit
The per-bike rating is the maximum allowed in one tray or position. A 160-pound two-bike rack does not automatically accept a single 108-pound bike if each position is limited to 80 pounds.
Do not average the load across empty positions or assume a short drive makes an overload acceptable.
3. Check the Rack’s Total Capacity
For two bikes, add both transport-ready weights. Include any add-on trays or accessories when the rack manual tells you to. Add-ons can reduce the permitted weight per position.
4. Calculate the Vehicle-and-Hitch Limit
The rack, bike, hitch, receiver, and vehicle each have ratings. The system is limited by the lowest applicable value.
Yakima’s hitch-fitting guidance instructs users to compare the vehicle and towbar limits, use the lower figure, and subtract the carrier’s own weight. The result is then capped by the carrier’s maximum capacity. assets.yakima.com Use the method specified by your vehicle, hitch, and rack manufacturers; do not substitute a towing-capacity number for an allowed vertical or tongue load.
5. Match the Receiver Size Without Guesswork
Confirm the receiver opening, rack shank size, pin location, and required clearance. Do not assume that an adapter preserves full capacity. Hitch-extension and adapter manufacturers warn that these parts can reduce allowable vertical load. curtmfg.com
Avoid stacking unapproved adapters to clear a spare tire, bumper, or tailgate. Ask the manufacturers when fit is uncertain.
6. Confirm 4-Inch Tire Compatibility
A “fat-bike” label should still be checked against the rack’s published maximum tire width. Confirm that the tray, wheel cup, and straps fit the actual inflated tire without forcing, crushing, or substituting homemade straps.
The KRAKEN’s current product page specifies 26 × 4.0-inch tires. A rack rated only for 3-inch tires is not compatible merely because the wheel can be balanced on the tray.
7. Measure Wheelbase—not Just Overall Length
Wheelbase is the distance between the front and rear axle centers. Compare that measurement with the rack’s permitted range and usable tray length. Also confirm wheel diameter and strap position.
KRAKEN’s published overall length is useful for garage and vehicle-clearance planning, but it cannot replace an actual wheelbase measurement.
8. Check the Approved Contact Points
Determine whether the rack holds the frame, wheels, or both. Then check for interference with fenders, brake rotors, motor cables, suspension parts, valves, and tire tread.
Never clamp a cable, battery rail, display, hydraulic hose, or moving suspension part. Wheel-contact racks may have special rules for fenders. Follow the exact instructions.
9. Decide How the Battery Will Travel
Remove the battery only if the bicycle manual permits it and you can do so without damaging the battery or connector. Removing it may make loading easier, but the remaining bike must still fall within every rack limit.
Transport a removed battery where it is protected from movement, moisture, metal objects, and extreme temperatures. Health Canada advises keeping carried lithium-ion batteries in a protective non-metal case, not leaving them in a hot or cold car, and never using swollen, dented, or otherwise damaged batteries. Canada.ca
10. Plan a Safe Loading Method
Check the lift height and whether the rack manufacturer offers an approved ramp. If two people load the bike, agree on hand positions and avoid rotors, chainrings, and pinch points.
Switch the e-bike off, remove loose cargo, secure the battery or remove it as directed, and keep the key away from the controls. Never use the throttle to power the bike up a rack ramp unless both the bicycle and rack manufacturers expressly provide that procedure.
11. Check Vehicle Clearance, Lights, and Plate Visibility
With the bike loaded, inspect tailgate clearance, exhaust proximity, ground clearance, vehicle width, rear-camera view, parking sensors, lights, turn signals, and the license plate.
Rules vary by state and province. NHTSA notes that bicycle loads interfering with required lighting can create a safety hazard and that state law governs obstruction requirements. NHTSA Ontario, for example, requires the entire plate to remain plainly visible and not be blocked by vehicle attachments or the load. ontario.ca Check every jurisdiction on the trip rather than treating one example as a North American rule.
12. Verify the Exact Travel Environment
Passenger cars, trucks, motorhomes, travel trailers, and fifth wheels do not create the same forces at the rack. Use a rack only in the environments expressly approved by its manufacturer, at the stated capacity for that environment.
Check whether the rack is approved for the intended road surface. An off-road e-bike does not make the vehicle rack off-road approved.
KRAKEN Hitch-Rack Compatibility Worksheet
| Item | Current KRAKEN information | What must be verified before purchase |
|---|---|---|
| Published bike weight | 108 lb / 49 kg | Whether the battery is included; actual transport-ready weight |
| Tire size | 26 × 4.0 in | Tray, wheel-cup, and strap compatibility |
| Battery | Removable | Approved removal method and safe in-vehicle containment |
| Overall dimensions | 79.9 × 28.3 × 48.4 in | Vehicle width, parking, tailgate, and rear clearance |
| Wheelbase | Not published as text | Measure from axle center to axle center |
| Rack capacity | Not a bicycle specification | Per-bike, total, and position-specific limits |
| Vehicle connection | Vehicle-specific | Receiver size, hitch rating, vertical load, and clearance |
| Travel use | Trip-specific | Passenger vehicle, RV, trailer, road, and surface approval |
This worksheet is a screening tool, not an approval. The rack manufacturer, hitch installer, and vehicle manual are the controlling sources for their respective components.
How to Load and Secure the Bike
Park on a firm, level surface away from traffic. Install the rack exactly as its manual specifies, including the hitch pin, anti-wobble mechanism, locks, and any required safety hardware.
Load the bike in the position and order specified by the rack manufacturer. Seat both wheels fully in their trays. Attach every primary retention arm and wheel strap to an approved point, then confirm that no strap crosses a rotor, motor cable, valve, or sharp edge.
A supplemental lock may deter theft, but it is not a substitute for the rack’s retention system.
Before driving:
- Shake the bike and rack separately to check for unexpected movement.
- Turn the handlebar as directed and secure any permitted moving parts.
- Remove bags, loose covers, and items that can catch wind.
- Confirm that the lights and license plate remain visible.
- Check that the rack and bike cannot contact the exhaust, road, vehicle, or another bicycle.
- Keep the rack key, battery key, and emergency contact information accessible.
Recheck the attachment after the first short section of the trip and at every stop. Stop immediately if the rack shifts, straps loosen, the bike leans, or a new vibration appears.
Frequently Asked Questions
Can a Standard Bicycle Rack Carry a Heavy E-Bike?
Only when the exact bike stays within the rack’s per-bike and total limits and meets every fit requirement. Many standard racks have lower ratings than heavy fat-tire e-bikes.
Does Removing the Battery Make Any Rack Compatible?
No. It may reduce weight if removal is permitted, but you must weigh the remaining bike and still verify tires, wheelbase, contact points, receiver, hitch, and vehicle capacity.
Will 4-Inch Tires Fit Every Fat-Bike Rack?
No. Check the published maximum tire width and whether special manufacturer-approved straps or trays are required.
Can I Use a Hitch Extender?
Only when the vehicle, hitch, extender, and rack manufacturers allow that combination. Extenders and adapters can reduce capacity and increase leverage.
Can I Cover the E-Bike While Driving?
Do not add a cover unless the rack manufacturer permits it. Covers can create wind load, hide loose straps, obstruct lights, or damage the bike and vehicle.
Can the Same Rack Be Used Behind an RV?
Not automatically. The rack must be expressly approved for the specific RV or trailer environment, and its RV capacity may be lower than its passenger-vehicle rating.
Conclusion
The right hitch rack is selected by measurements and ratings—not by a broad “e-bike compatible” label. Verify the transport-ready bike weight, per-bike limit, total capacity, vehicle and hitch load, receiver fit, tire width, wheelbase, contact points, battery plan, loading method, rear visibility, and travel environment.
The WILDEWAY KRAKEN is designed for riders who want full-size fat tires, full suspension, and all-terrain utility. Before taking that capability on the road, build a transport system that is honestly rated for the exact bike and vehicle.
Explore the WILDEWAY KRAKEN, review its current dimensions and equipment, and complete the compatibility worksheet before purchasing any carrier.


