

How to Choose the Right E-Bike Size and Fit
Motor power, battery capacity and estimated range often receive the most attention when people compare electric bikes. However, none of those specifications can compensate for a bicycle that does not fit its rider properly.
An e-bike that feels too tall, too long or difficult to stabilize can make starting, stopping and low-speed maneuvering unnecessarily challenging. A saddle that is too low may make pedaling inefficient, while one that is too high can cause the rider to rock from side to side or struggle to reach the pedals consistently.
Correct fit is especially important on an e-bike because the bicycle may be heavier than a conventional bike and may accelerate as soon as pedal assistance engages.
The National Highway Traffic Safety Administration advises riders to use a bicycle that fits them, noting that a bicycle that is too large is harder to control. But rider height is only the first part of the decision.
This guide explains how to evaluate an e-bike’s frame, saddle, handlebar, reach and overall riding position before completing a controlled test ride.
The Short Answer
To choose the right e-bike size and fit:
-
Check the manufacturer’s recommended rider-height range.
-
Compare your inseam and mobility with the frame’s entry height.
-
Confirm that the saddle can be adjusted to a practical pedaling position.
-
Make sure you can reach the handlebar without locking your elbows.
-
Check that you can operate both brake levers and all controls comfortably.
-
Evaluate how easily you can mount, stop, stabilize and dismount.
-
Consider the bicycle’s weight—not only its frame dimensions.
-
Wear your normal riding shoes during the fit check.
-
Test the bicycle at low speed in a traffic-free area.
-
Stop riding and seek professional assistance if the position causes pain, numbness or loss of control.
A published height range is a useful screening tool, but it is not a guarantee of perfect fit. Riders of the same height can have different leg, torso and arm proportions.
E-Bike Fit Checklist
| Fit area | What to confirm |
|---|---|
| Rider-height range | Your height falls within the manufacturer’s published range |
| Frame access | You can mount and dismount without hitting or catching the frame |
| Saddle adjustment | The seat can be positioned for controlled, comfortable pedaling |
| Handlebar reach | Your shoulders remain relaxed and elbows slightly bent |
| Brake access | You can operate both brake levers without changing your grip |
| Steering clearance | The handlebar turns without contacting your knees or clothing |
| Stop stability | You can stop, place a foot down and restart predictably |
| Pedal clearance | Your knees and heels do not contact the frame or accessories |
| Bike weight | You can hold, push and park the bike without losing control |
| Test ride | Starting, turning, braking and dismounting feel predictable |
1. Begin With the Manufacturer’s Size Guide
Start with the size information published for the exact model and configuration you are considering.
Do not assume that every “one-size” e-bike fits every adult. One-size normally means that the bicycle is produced in one frame size with adjustable components—not that it suits every possible rider.
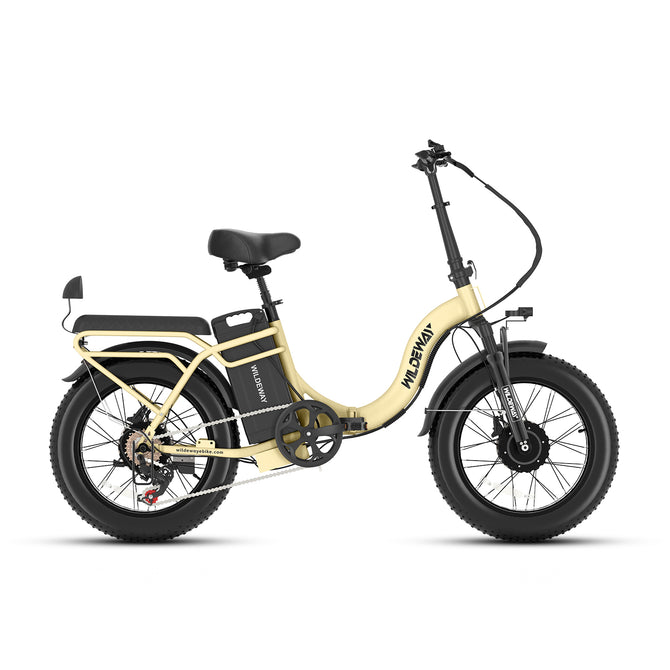
The current WILDEWAY FW11S 3.0 Pro product specifications, for example, list a recommended rider-height range of 5 feet 2 inches to 6 feet 4 inches and a seat-height range of approximately 33.4 to 37.4 inches.
The WILDEWAY SummitX currently lists a recommended rider-height range of 5 feet 4 inches to 6 feet 4 inches and a seat-height range of approximately 35 to 43.3 inches.
These measurements help narrow the selection, but they should be considered together with:
-
Inseam length
-
Torso length
-
Arm length
-
Hip and knee mobility
-
Balance and riding experience
-
Preferred riding posture
-
Normal footwear
-
Cargo or passenger accessories
-
The weight of the complete bicycle
Always check the latest product page and owner’s manual because specifications can differ between models and may change with updated versions.
2. Measure More Than Your Total Height
Two riders who are both 5 feet 8 inches tall may not fit the same bicycle in the same way. One may have longer legs and a shorter torso, while the other has shorter legs and longer arms.
Measure your height without shoes, then measure your cycling inseam.
To estimate inseam:
-
Stand with your back against a wall.
-
Wear the clothing you normally expect to ride in.
-
Place your feet approximately shoulder-width apart.
-
Position a straight-edged book or similar object between your legs.
-
Raise it gently until it represents the position of a bicycle saddle.
-
Measure vertically from the floor to the top edge.
Use this measurement only as a comparison tool. Do not convert it automatically into saddle height using a universal formula, because bicycle geometry, crank length, footwear and rider mobility vary.
If you fall near either end of a model’s recommended height range, ask the manufacturer to confirm relevant geometry before ordering.
3. Evaluate Frame Access and Mounting Movement
Frame style affects how the rider gets on and off the bicycle.
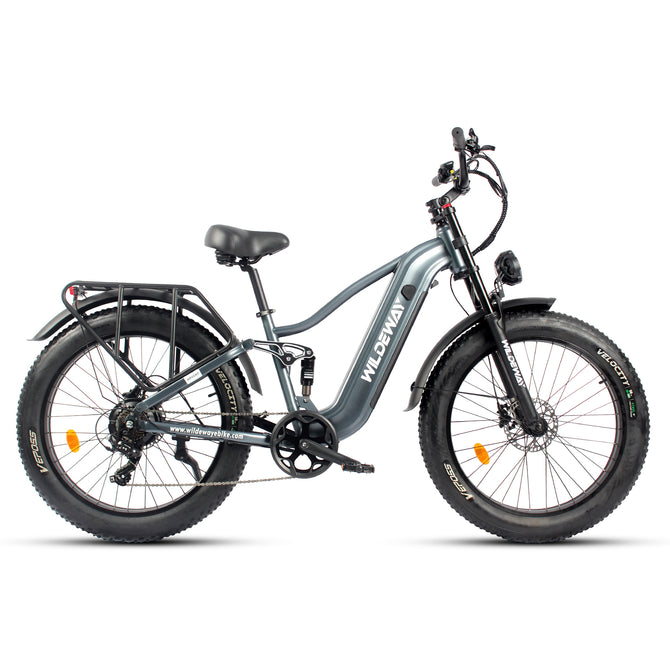
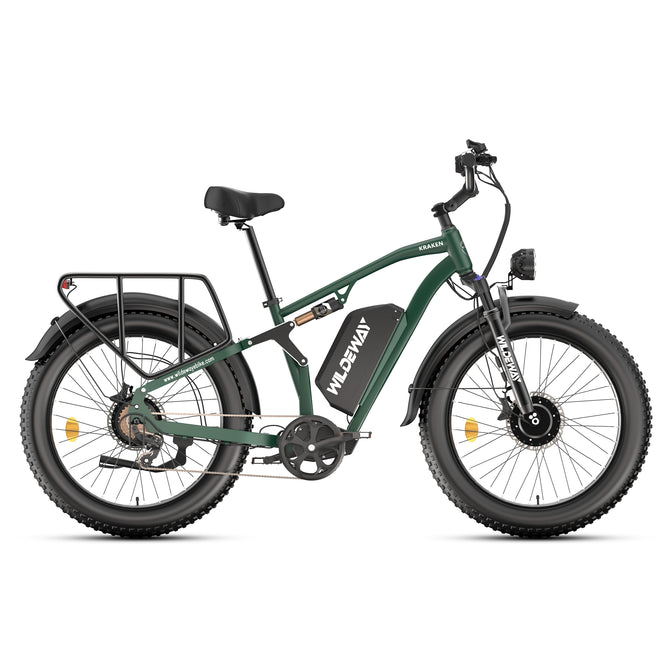
A step-over frame has a higher center tube. It may feel familiar to riders who have regularly used conventional bicycles, but it normally requires more hip movement when mounting.
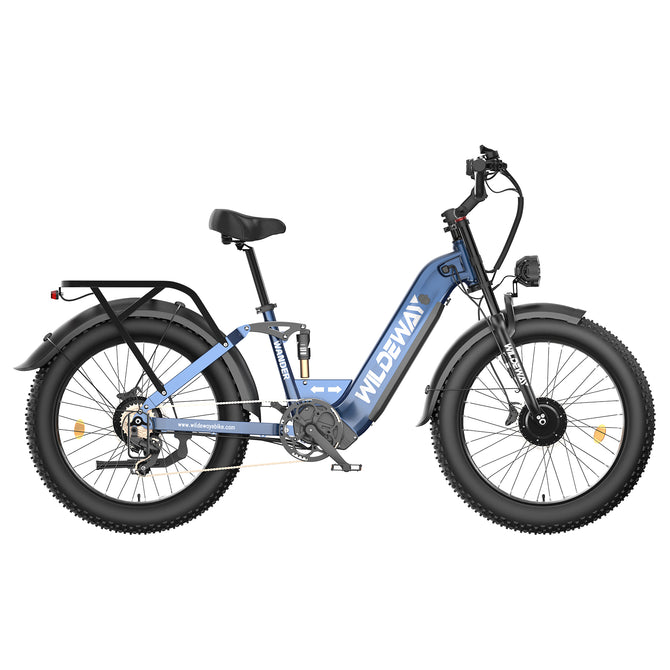
A step-through frame provides a lower, more open entry area. This can be useful for:
-
Frequent commuting stops
-
Grocery and delivery trips
-
Riders wearing work clothing
-
Riders with limited hip mobility
-
Riders using a loaded rear rack
-
Anyone who prefers not to swing a leg over the rear of the bike
You can review the differences in WILDEWAY FW11 vs. FW11S 3.0 Pro: Which Folding E-Bike Is Right for You?.
A step-through frame does not automatically guarantee correct sizing. You must still check saddle adjustment, handlebar reach, control access and the ability to stabilize the bicycle.
When testing frame access, keep the motor system off. Mount and dismount several times from both sides on a level surface.
4. Set a Practical Saddle Height
Saddle height affects pedaling, comfort and the rider’s ability to control the bike.
If the saddle is too low, the knees may remain excessively bent throughout the pedal stroke. If it is too high, the rider may point the toes downward, shift the hips across the saddle or struggle to maintain consistent contact with the pedals.
As a starting check:
-
Place the bike on level ground.
-
Ask another adult to stabilize it.
-
Sit in your normal riding position.
-
Place one pedal near the bottom of its rotation.
-
Confirm that your knee is not locked straight or deeply compressed.
-
Pedal backward slowly and watch for hip rocking.
-
Make small adjustments and repeat the check.
Follow the owner’s manual and never extend the seatpost beyond its minimum-insertion or maximum-extension marking. A seatpost raised past its approved limit may not have enough material remaining inside the frame.
The saddle should also remain level unless the manufacturer provides another recommended position. A sharply tilted saddle can make the rider slide forward or place unnecessary pressure on the arms and hands.
5. Do Not Use “Both Feet Flat” as the Only Fit Rule
Many new riders believe they must place both feet completely flat on the ground while remaining seated. That may feel reassuring, but it can lead to an excessively low saddle and an inefficient pedaling position.
Stopping technique depends on the bicycle, rider and riding environment. Many riders stop by moving slightly forward from the saddle and placing one foot securely on the ground.
However, confidence at stops still matters—especially on a heavy electric bike. You should be able to:
-
Stop without the bicycle leaning unexpectedly
-
Place at least one foot securely on the ground
-
Hold the bicycle upright without panic
-
Restart without sudden steering movement
-
Dismount before losing balance
If reaching the ground feels uncertain, consider a Step-Thru frame, a different model or professional assistance with the setup. Do not lower the saddle so far that it prevents safe and comfortable pedaling.
6. Check Handlebar Reach and Upper-Body Position
Sit on the adjusted saddle and place both hands on the grips.
Your shoulders should feel relaxed rather than raised toward your ears. Your elbows should remain slightly bent so your arms can absorb normal road vibration and steering movement.
Signs that the reach may be too long include:
-
Locked elbows
-
Excessive pressure on the hands
-
A strongly stretched torso
-
Difficulty looking ahead
-
Inability to turn the handlebar comfortably
-
Sliding toward the front of the saddle
Signs that the cockpit may feel too short include:
-
Knees approaching or touching the handlebar
-
A cramped torso
-
Difficulty steering through slow turns
-
Wrists forced into an uncomfortable angle
If the bicycle includes an adjustable stem, use only positions allowed by the manufacturer. Tighten every fastener to the specified torque and confirm that the stem, handlebar and display cannot rotate unexpectedly.
Do not extend, drill, cut or replace steering components with incompatible parts simply to create additional reach.
7. Confirm Access to Brakes and Controls
While maintaining your normal grip, confirm that you can reach both brake levers easily.
You should not have to release most of the handlebar, rotate your wrist sharply or stretch your fingers to begin braking.
Also check your access to:
-
Pedal-assist controls
-
Gear shifter
-
Throttle, where equipped and legally permitted
-
Bell
-
Turn-signal controls
-
Display buttons
-
Headlight control
Turn the handlebar fully to both sides while the motor remains off. Confirm that cables are not pulled tight and that your knees, clothing and accessories remain clear.
If the brake-lever reach is adjustable, follow the component and bicycle manufacturer’s instructions. Brake adjustments should not be used to compensate for worn pads, damaged cables or an incorrectly assembled system.
8. Consider the Complete Weight of the E-Bike
A bicycle can match your height but still be difficult to manage because of its weight.
Before buying, consider whether you can:
-
Lift the bike upright from the kickstand
-
Hold it steady while loading cargo
-
Push it up a ramp
-
Walk it through a narrow space
-
Turn it around in a garage
-
Control it if the bike begins leaning
-
Load it into a compatible vehicle
-
Use the folding mechanism safely
Battery size, motor count, frame construction and accessories can make two similarly sized e-bikes feel very different.
If the battery is removable, removing it may reduce weight during approved transport or handling procedures. Switch the bicycle off first and follow the owner’s manual. Never remove or install a battery while relying on the bicycle’s electrical assistance.
9. Recheck Fit After Adding Cargo
Panniers, baskets, child carriers and delivery boxes can change the way you mount and stabilize the bicycle.
A tall object on the rear rack may prevent you from swinging a leg over the back. A heavy load can also make the bicycle lean more strongly when stopped.
After installing approved cargo accessories, confirm that:
-
Your mounting path remains unobstructed
-
Your heels do not strike the panniers
-
The handlebar turns fully
-
You can place a foot down safely
-
Cargo does not push you forward on the saddle
-
The complete setup stays within all weight limits
Review How to Carry Cargo Safely on an E-Bike before riding with a loaded rack.
10. Complete a Traffic-Free Fit Test
The final fit decision should include a controlled riding test.
NHTSA recommends practicing in a safe environment away from traffic, such as an empty parking lot or suitable path.
Begin with the lowest practical pedal-assist setting and test:
-
Mounting with the system off
-
Starting smoothly
-
Riding in a straight line
-
Wide left and right turns
-
Operating both brakes
-
Looking behind without swerving
-
Stopping and placing one foot down
-
Restarting from a stop
-
Dismounting
-
Walking and parking the bicycle
Do not immediately use maximum assistance. A poor riding position may become more difficult to manage when the motor accelerates strongly.
Stop the test if you experience pain, numbness, loss of control, repeated knee contact, unstable steering or difficulty reaching the brakes.
Common E-Bike Fit Mistakes
Avoid these frequent errors:
-
Buying solely from a general height chart
-
Assuming one-size means universal fit
-
Ignoring inseam and frame-entry height
-
Raising the seatpost beyond its marked limit
-
Lowering the saddle only to place both feet flat
-
Riding with locked elbows
-
Stretching to reach the brake levers
-
Choosing a bike that is too heavy to stabilize
-
Testing with maximum assistance
-
Ignoring normal riding shoes and clothing
-
Adding cargo without rechecking mounting clearance
-
Continuing to ride through pain or numbness
Frequently Asked Questions
Can one e-bike size fit riders of different heights?
It may fit a published range of rider heights through saddle and handlebar adjustment. It will not necessarily provide the same posture or comfort for every rider in that range.
Is rider height enough to choose an e-bike?
No. Height is the first screening measurement. Inseam, torso length, arm length, mobility, bicycle weight and intended use also affect fit.
Should I be able to place both feet flat while seated?
Not necessarily. The saddle must also support an appropriate pedaling position. You should, however, be able to stop and place a foot securely on the ground without losing control.
Is a step-through e-bike better for shorter riders?
It can make mounting and dismounting easier, but frame style alone does not determine fit. Check the published height range, saddle adjustment, reach and complete bicycle weight.
Can I raise the seatpost as high as necessary?
No. Never raise it beyond the marked safety limit. If the correct riding position requires exceeding that mark, the bicycle or seatpost setup is not appropriate.
What if I am between two sizes?
Compare the manufacturer’s geometry and your intended posture. When possible, test both sizes or consult the manufacturer or a qualified bicycle fitter before ordering.
When should I seek professional fitting help?
Seek assistance if you experience persistent pain or numbness, cannot find a stable position, have limited mobility, are recovering from an injury or require major component changes.
Final Fit Check
Before your first normal ride, ask:
-
Am I within the manufacturer’s recommended height range?
-
Can I mount and dismount without catching the frame?
-
Is the seatpost safely below its extension limit?
-
Can I pedal without rocking my hips?
-
Are my shoulders relaxed and elbows slightly bent?
-
Can I reach both brake levers easily?
-
Does the handlebar turn without contacting my knees?
-
Can I stop and place a foot down predictably?
-
Can I hold and push the complete bike safely?
-
Did I complete a low-speed test away from traffic?
Conclusion
Choosing the right e-bike requires more than matching your height to a number on a product page.
Start with the manufacturer’s recommended height range, then examine your inseam, mounting movement, saddle position, handlebar reach and access to the brakes. Consider the complete weight of the bicycle and how cargo may affect mounting and balance.
Make small adjustments, respect every component’s safety markings and complete a low-speed test in a traffic-free area.
The correct e-bike should allow you to start, steer, brake, stop and dismount predictably. If the bike still feels too tall, too long, too heavy or difficult to control after adjustment, choose a different model rather than forcing the setup to work.
Explore WILDEWAY folding, commuter and all-terrain e-bikes, compare the published size information and contact WILDEWAY support if you need model-specific fit guidance before ordering.


